
Creating your own custom tactical backpack represents the ultimate solution for those who find commercial options lacking. This guide walks you through designing a tactical backpack perfectly tailored to your unique requirements. Whether you’re an outdoor enthusiast, military professional, or everyday carrier seeking optimal organization and accessibility, this guide provides the knowledge needed to conceptualize your ideal tactical backpack.
1. Why should you design your own custom tactical backpack?
What’s the real story behind the growing trend of custom tactical backpacks? It begins with recognizing the limitations inherent in mass-produced options. Commercial products must cater to average users rather than specific individual needs.
Commercial tactical backpacks frequently present compromises. Manufacturers balance features, materials, and construction methods to appeal to the broadest market while maintaining profitable price points. For users with specific requirements, these compromises significantly impact functionality and comfort.
The gap between personalized needs and standardized products becomes particularly evident for specialized activities. Professional users in fields like photography, emergency response, or technical outdoor pursuits often require specific organizational layouts that rarely align perfectly with off-the-shelf options.
Custom design delivers substantial advantages in functionality and comfort. By controlling every aspect, you can prioritize features most critical to your specific use case while eliminating unnecessary elements. The ability to precisely position compartments, access points, and support structures according to your body measurements results in superior ergonomics and weight distribution.
| Aspect | Commercial Tactical Backpacks | Custom Tactical Backpacks |
|---|---|---|
| Design Focus | Mass-market appeal | Individual-specific requirements |
| Feature Prioritization | Balanced for average users | Optimized for personal needs |
| Ergonomic Fit | Standardized sizing | Tailored to individual body metrics |
| Material Selection | Limited by price point targets | Chosen specifically for intended use |
| Organizational Layout | Generalized compartment design | Precisely configured for specific gear |
2. What key factors should you consider before starting your design?
This is where it gets interesting – the pre-design phase often determines whether your custom backpack will truly outperform commercial alternatives.
Clarifying use scenarios and core functional requirements forms the foundation of effective design. Document specific activities where you’ll use the backpack, including environmental conditions, duration of use, and movement patterns. Create a comprehensive inventory of items you’ll typically carry, noting not just what needs to be carried but how frequently you’ll need to access each item.
Body dimensions and ergonomic considerations significantly impact comfort and functionality. Accurate measurements of your torso length, shoulder width, and preferred carry position provide the basis for proper sizing and strap placement. Consider your physical strengths and limitations honestly – existing back or shoulder issues should influence weight distribution strategies.
Balancing budget against material choices represents a critical decision point. High-performance technical fabrics deliver superior durability but at higher cost. Analyze which components truly require premium materials based on stress points and environmental exposure.
Skill level assessment prevents overambitious projects. If you intend to construct the backpack yourself, honestly evaluate your sewing abilities. Complex designs requiring advanced techniques may exceed beginner capabilities, resulting in frustration or abandoned projects.
3. How do you determine the ideal backpack size and capacity for your needs?
But here’s the kicker – while many designers focus exclusively on volume measurements, the true art lies in matching dimensional proportions to both your body and your specific gear requirements.
Different activity types generate distinct capacity requirements. Daily urban carry typically requires 15-25 liters, accommodating essentials like electronics, light layers, and daily provisions. Short tactical operations or day hikes generally demand 25-35 liters, providing space for mission-specific equipment. Extended operations or multi-day activities may require 35-50+ liters.
Body height and build significantly influence appropriate backpack dimensions beyond simple volume considerations. Torso length represents the most critical measurement, determining the vertical dimension of your pack. Measure from the C7 vertebra (the prominent bone at the base of your neck) to the iliac crest (top of your hip bones). This measurement typically ranges from 15-22 inches and should correspond to the length of your backpack’s back panel.
Modular design and expandability considerations can resolve the tension between everyday carrying efficiency and occasional need for greater capacity. Consider incorporating compression systems that maintain a compact profile when partially loaded. Expandable compartments using gusseted designs with compression straps allow temporary volume increases without permanently enlarging the pack’s footprint.
4. Which materials are best suited for custom tactical backpacks?
You might be surprised by how significantly materials influence not just longevity but also functionality and comfort in various operating conditions.
High-performance fabric characteristics vary substantially across different tactical applications. Ballistic nylon (typically 1050D or 1680D) offers exceptional abrasion and tear resistance but adds considerable weight. Cordura nylon (usually 500D-1000D) provides an excellent balance of durability and weight, with better flexibility than ballistic variants. Ripstop nylon incorporates reinforcement threads in a grid pattern, offering good tear resistance at lighter weights.
Different nylon strengths present important tradeoffs. Denier ratings (the “D” in 1000D) indicate thread thickness and generally correlate with durability and weight – higher numbers provide greater durability but increased weight and reduced flexibility. Beyond nylon, materials like X-Pac combine multiple material layers to create lightweight, waterproof, and dimensionally stable fabrics ideal for technical applications.
Waterproof material selection should reflect realistic usage scenarios. Fully waterproof materials provide complete water protection but eliminate breathability and add weight. Water-resistant fabrics with DWR treatments offer practical protection for most conditions while maintaining breathability.
| Material Category | Recommended Options | Best Applications | Limitations |
|---|---|---|---|
| Outer Fabric | 500D-1000D Cordura Nylon | Main body construction, high-abrasion areas | Heavier than lightweight alternatives |
| Lightweight Fabric | 210D-420D Ripstop Nylon | Internal dividers, low-stress areas | Insufficient durability for high-abrasion zones |
| Waterproof Options | X-Pac VX21/VX42, TPU-coated nylon | Weather-exposed areas, bottom panels | Added weight, reduced breathability |
| Reinforcement Material | Hypalon, 1680D Ballistic Nylon | Bottom panels, attachment points, high-wear zones | Stiffness, weight, cost |
| Mesh Materials | Spacer mesh, hex mesh | Back panels, internal organization | Limited durability, potential snagging |
5. How do you design an ergonomic carrying system?
What’s the real story behind truly ergonomic carrying systems? It begins with understanding that proper load transfer to the body’s structural elements makes a 20-pound load feel substantially lighter than a poorly designed system carrying just 10 pounds.
Shoulder strap design requires careful attention to anatomical realities. Effective shoulder straps should measure 2.5-3 inches wide at the top where they contact the shoulder, tapering slightly toward the attachment points. This width distributes pressure across the trapezius muscle without restricting neck movement. The strap’s curve should match your shoulder’s contour – too straight and it creates pressure points, too curved and it may slip.
Waist belt and sternum strap functionality significantly enhances load management. Waist belts should transfer 60-80% of the pack weight to the hips, reducing shoulder strain during extended carries. Position the belt to ride at the iliac crest (top of hip bones) rather than the waist for proper skeletal loading. Sternum straps stabilize shoulder straps, preventing them from sliding outward during movement.
Back panel structure addresses the competing needs of load stability and heat management. Traditional foam panels provide excellent load stability but trap heat. Suspended mesh systems create an air channel between pack and back, improving ventilation but potentially reducing stability with heavier loads. Hybrid systems utilizing channeled foam with ventilation cutouts offer a practical compromise.
6. How do you plan the internal organization structure of your backpack?
This might surprise you, but proper internal organization can reduce access time by up to 70% while significantly decreasing stress during critical situations.
Main compartment and secondary compartment functional differentiation establishes the foundational organizational structure. The main compartment typically occupies 50-60% of total capacity, housing larger items. Secondary compartments provide dedicated spaces for logically grouped items requiring separate access.
Balancing specialized compartments with multipurpose spaces prevents over-compartmentalization while maintaining organization. Dedicated compartments for frequently accessed items improve efficiency but consume volume even when empty. Multipurpose spaces with adjustable dividers provide flexibility for changing loadouts.
Quick-access system design can prove critical in time-sensitive situations. Position quick-access pockets where they can be reached without removing the pack – typically at the top, sides, or on the shoulder straps. For emergency equipment, create dedicated zones with visual or tactile identification features that remain consistent regardless of other pack contents.
| Organization Feature | Best Placement | Ideal Contents | Design Considerations |
|---|---|---|---|
| Admin Panel | Front or top secondary compartment | Small essentials, writing tools, electronics | Multiple small pockets, secure closures, easy access without removing pack |
| Main Compartment | Center of pack, against back panel | Larger items, clothing, primary equipment | Balance between top-loading efficiency and panel-loading accessibility |
| Quick-Access Pockets | Top lid, shoulder straps, belt | Frequently needed items, navigation tools, snacks | Operable with one hand, secure enough to prevent accidental opening |
| Hydration Compartment | Against back panel or dedicated sleeve | Water reservoir, filtration system | Insulation considerations, routing for drinking tube, drainage provision |
| Secure Document Zone | Hidden against back panel | Identification, permits, sensitive information | RFID protection option, water-resistant construction, non-obvious access |
7. How do you integrate MOLLE systems into your custom design?
Ready for the good part? Properly implemented MOLLE systems transform your backpack from a fixed-capacity container into an infinitely adaptable platform that evolves with changing mission requirements.
MOLLE grid spacing and layout standards must adhere to specific measurements to ensure compatibility with commercial attachments. Standard MOLLE webbing uses 1-inch wide nylon webbing sewn in horizontal rows with 1.5-inch spacing between attachment points. Vertical spacing between rows should maintain 1-inch centers. This standardized grid pattern ensures compatibility with military-spec pouches and accessories.
Tactical attachment compatibility design considerations extend beyond basic measurements. Backing material behind MOLLE webbing should provide sufficient structure to support fully loaded attachments without distortion. Consider using 1000D Cordura with additional internal reinforcement at high-stress points.
Modular expansion zone optimal positioning depends on both accessibility and weight distribution principles. Primary MOLLE fields typically occupy the front face of the pack, providing maximum visibility and access. Secondary fields on the sides accommodate items requiring quick access without removing the pack.
8. What specialized features can you add to your custom backpack?
This is where it gets interesting – thoughtfully implemented specialized features can dramatically improve functionality while poorly executed additions merely add weight and complexity without practical benefit.
Concealed carry compartment design principles balance security, accessibility, and discretion. Position these compartments against the back panel for both security and weight distribution advantages, typically accessed via side zippers or hook-and-loop closures. Implement internal retention systems using adjustable straps or hook-and-loop panels compatible with holster attachments.
Quick-access system structural design focuses on reducing retrieval time for critical equipment. Implement clamshell openings with oversized zipper pulls or specialized closures operable with one hand or while wearing gloves. Consider high-visibility interior colors in these compartments to improve item identification in low-light conditions.
Hydration system compatibility addresses both capacity and practical usability concerns. Create a dedicated hydration sleeve positioned either against the back panel or in a separate compartment, sized to accommodate your preferred reservoir capacity (typically 1-3 liters). Design tube routing channels through shoulder straps with securing points to prevent unwanted movement.
Electronic device protection increasingly represents essential tactical backpack features. Implement impact-resistant padded compartments with water-resistant closures for sensitive electronics. Consider including cable pass-through ports between compartments to connect devices to power sources while maintaining organization.
9. How do you design external features and attachment systems?
But here’s the kicker – poorly designed external systems can create snag hazards, imbalance the pack’s weight distribution, or fail at critical moments, potentially compromising operational effectiveness.
Strategic layout of attachment points and compression straps requires balancing accessibility, security, and profile management. Position compression straps at both the top and bottom thirds of the pack to effectively secure loads of varying sizes. Implement side compression straps with quick-release buckles to manage pack volume while providing external attachment options for larger items.
Multi-functional side pocket design addresses both storage and accessibility requirements. Implement expandable side pockets using elastic or gusseted designs to accommodate various item sizes while maintaining a streamlined profile when empty. Consider dual-access designs allowing items to be inserted from both top and side for maximum versatility.
Equipment securing system safety considerations prevent both equipment loss and potential hazards. Implement redundant closure systems combining mechanical fasteners (buckles, hooks) with tension systems (elastic, compression) for critical attachment points. Design external attachment systems with breakaway features for emergency situations where entanglement could pose safety risks.
10. What tools and techniques are needed during the construction process?
You won’t believe how significantly proper tool selection and technique application impact the final product’s durability, functionality, and appearance.
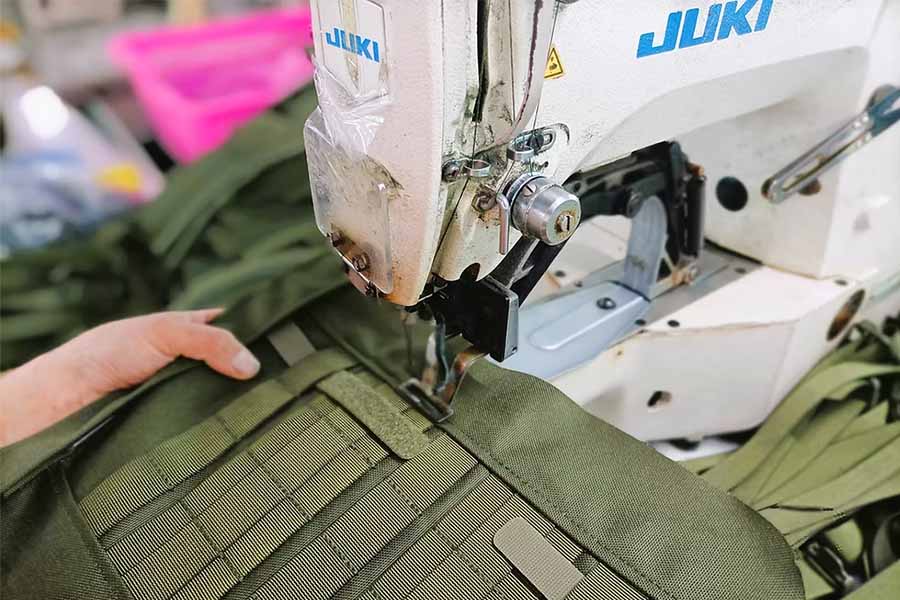
Basic and advanced sewing equipment selection depends on the materials and construction methods employed. For most tactical backpack projects, a heavy-duty sewing machine capable of handling multiple layers of heavy fabric is essential – look for walking foot or compound feed machines designed for upholstery or light industrial applications. Needle selection should match material weight, typically using #16-#18 needles for main construction.
Cutting tools and precise measurement methods ensure accurate component creation before assembly begins. Invest in rotary cutters with fresh blades for clean, precise cuts on technical fabrics. Pattern weights rather than pins prevent material distortion during cutting. Transparent rulers and marking tools designed for fabric enable precise pattern transfer.
Special material handling techniques address the unique challenges of technical fabrics. Use microtex or sharp needles rather than universal needles to prevent fabric damage when sewing technical materials. Apply seam sealants to needle holes in waterproof materials to maintain water resistance.
| Tool/Technique Category | Essential Items | Application | Skill Development Approach |
|---|---|---|---|
| Sewing Equipment | Walking foot machine, #16-#18 needles, V-69 bonded nylon thread | Primary construction of pack body and components | Practice on scrap materials of similar weight before cutting project materials |
| Cutting Tools | Rotary cutter, self-healing mat, pattern weights, transparent rulers | Precise cutting of pack components from technical materials | Create paper templates first, then transfer to fabric after verification |
| Material Handling | Binder clips, fabric markers, seam sealant, edge binding | Managing technical fabrics during construction process | Test techniques on material scraps before implementing on final components |
| Reinforcement Methods | Bartack patterns, binding tape, webbing, reinforcement patches | Strengthening high-stress areas for durability | Identify all potential stress points during design phase before construction |
11. How do you create effective backpack design blueprints?
What’s the real story behind effective tactical backpack blueprints? They combine precise technical specifications with practical construction guidance, enabling accurate execution even when facing the inevitable challenges of complex projects.
Design software versus hand-drawn approaches present different advantages depending on your workflow and technical capabilities. Computer-aided design (CAD) software provides precision, easy modification, and the ability to create multiple variations from a base design. Hand-drawn approaches, while less precise, often prove more accessible for conceptual development and quick iterations.
Three-view and pattern drawing techniques translate three-dimensional concepts into constructible two-dimensional components. Standard tactical backpack blueprints should include front, side, and top orthographic views showing overall dimensions and key feature placement. Component patterns require additional detail, showing precise cut lines, seam allowances, and assembly reference marks.
Dimension notation and material specification standards ensure clarity during the construction process. Implement a consistent dimensioning system using either imperial (inches) or metric (centimeters) measurements throughout all documentation. Create detailed material callouts for each component, specifying not just material type but specific characteristics like denier rating, coating type, and color.
12. How do you select and implement appropriate sewing techniques?
This might surprise you, but the difference between amateur and professional-quality tactical gear often lies more in construction technique than in design concept or material selection.
Different seam types offer varying strength characteristics and appropriate applications throughout the pack. Simple straight seams suffice for non-stress areas and internal organization but provide minimal strength for structural components. Flat-felled seams, while more complex to execute, offer superior strength and finished appearance for external seams and main compartment construction.
Reinforcement techniques for critical areas prevent premature failure at stress points. Implement bartack stitching (dense zigzag patterns) at all strap attachments, handle connections, and MOLLE webbing endpoints. Box-X stitching provides excellent reinforcement for larger attachment areas like shoulder strap connections to the pack body.
Waterproof seam and sealing methods maintain weather resistance in challenging conditions. Taped seams using heat-activated seam tape provide the most reliable waterproofing but require specialized equipment. Liquid seam sealants offer a more accessible alternative, though with somewhat less durability.
13. How do you test and optimize your custom backpack design?
Here’s what you need to know – while initial design and quality construction establish the foundation, rigorous testing reveals the subtle improvements that elevate good designs to greatness.
Load testing and comfort assessment methodologies evaluate the pack’s performance under realistic conditions. Begin with progressive load testing, starting at 25% of the pack’s intended capacity and incrementally increasing to 125% to identify both optimal performance range and failure thresholds. Conduct weighted wear tests of increasing duration to reveal comfort issues that emerge only during extended use.
Durability and waterproofing performance testing techniques identify potential failure points before field deployment. Conduct abrasion resistance testing by repeatedly dragging weighted pack sections across rough surfaces, focusing on bottom panels and other high-contact areas. Test strap and attachment strength using static load testing with weights exceeding expected operational loads by at least 50%.
Functionality and usability evaluation standards assess how effectively the pack performs its intended purpose. Create task-specific testing protocols measuring time required to access different equipment types from various carrying positions. Evaluate organization effectiveness by timing pack loading/unloading with standardized equipment sets.
14. How can you reduce the costs of custom backpack creation?
But here’s the kicker – thoughtful planning and strategic resource allocation often yield superior results compared to simply purchasing the most expensive materials and equipment available.
Material sourcing and alternative selection strategies significantly impact overall project costs. Consider purchasing factory seconds or discontinued colors of premium materials, which often offer identical performance at substantial discounts. Explore military surplus outlets for high-quality hardware and webbing at reduced prices.
Tool sharing and workshop resource utilization reduce equipment investment requirements. Investigate makerspace memberships providing access to industrial sewing machines, cutting tables, and specialized equipment without purchasing these items outright. Develop collaborative relationships with other tactical gear enthusiasts to share specialized tools.
Phased construction and modular investment approaches distribute costs over time while providing functional equipment throughout the process. Begin with core pack components providing basic functionality, then add specialized features in subsequent phases as budget allows.
15. How do you incorporate commercial-grade details into your custom design?
You might be surprised by how significantly these seemingly minor refinements impact both performance and perceived quality of the final product.
Professional-grade stitching and edge finishing techniques create both functional and aesthetic improvements. Implement consistent stitch length and tension throughout the project – typically 8-10 stitches per inch for structural seams and 10-12 for detail work. Backstitch 1/2 inch at the beginning and end of all seams to prevent unraveling. Edge finishing techniques like binding with grosgrain ribbon create clean, professional appearances while protecting raw edges from abrasion.
Brand elements and personalization details transform anonymous projects into distinctive custom creations. Design a personal logo or identifier that can be consistently applied across your projects, creating a cohesive brand identity. Implement this branding through woven labels, embroidery, custom patches, or subtle tonal printing depending on your aesthetic preference.
Structural detail adaptation from commercial backpacks incorporates proven solutions into custom designs. Study high-end commercial tactical backpacks to identify subtle construction techniques like bartack placement patterns, reinforcement strategies, and hardware mounting methods.
FAQ Section
Q1: What is the MOLLE system on tactical backpacks?
MOLLE (Modular Lightweight Load-carrying Equipment) is a standardized attachment system consisting of horizontal webbing rows stitched at regular intervals to create attachment points for compatible pouches and accessories. This system originated in military applications but has become standard across tactical equipment, allowing users to customize their load-carrying configuration based on specific mission requirements. Standard MOLLE webbing uses 1-inch wide nylon webbing with 1.5-inch spacing between attachment points, creating a universal grid pattern that ensures compatibility with standardized tactical accessories.
Q2: How do I determine what capacity tactical backpack I need?
Determining appropriate tactical backpack capacity requires analyzing three key factors: usage duration (daily commute vs. multi-day operations), equipment inventory (volume and weight), and your physical build. Generally, everyday carry applications require 20-25 liters, short excursions need 30-40 liters, while extended operations may demand 45+ liters. The most accurate assessment method involves creating a complete equipment inventory, physically arranging all items you’ll typically carry, then measuring the total volume. Remember to include capacity for consumables, weather-dependent gear, and mission-specific equipment that might not be carried daily but must be accommodated when needed.
Q3: What basic sewing skills are needed for custom tactical backpack creation?
Essential sewing skills for tactical backpack creation include straight-line stitching, corner construction, triple-reinforcement stitching, box-X reinforcement, and edge finishing techniques. Beginners should start with simpler components like accessory pouches before progressing to main structural elements. While industrial sewing machines are ideal, quality heavy-duty domestic machines with appropriate needles and thread can complete most construction tasks. The critical factor is understanding material properties and structural stress points rather than advanced sewing techniques alone. Practice on material scraps before cutting project materials, focusing particularly on multi-layer stitching and proper tension adjustment for consistent results.
Q4: How can I ensure my DIY tactical backpack is waterproof?
Creating waterproof performance requires a multi-layered approach: selecting waterproof materials (like PU-coated nylon or waterproof canvas), implementing waterproof zippers or protective zipper flaps, applying seam sealing techniques (either tape or liquid sealants), and designing protective flaps or roll-top closures for openings. Fully waterproof backpacks require specialized construction methods like welded seams or roll-top closures with complete sealing, but most DIY projects can achieve water-resistance sufficient for typical conditions. Focus waterproofing efforts on critical compartments designed to protect electronic equipment or essential gear, while accepting that complete pack submersion protection requires advanced techniques beyond most DIY capabilities.
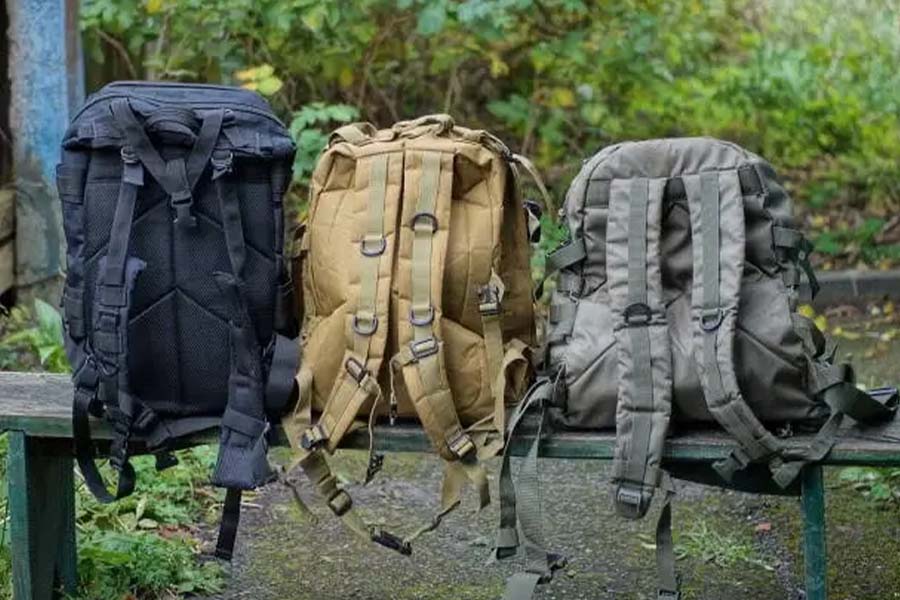
Q5: What advantages does a custom tactical backpack offer compared to commercial products?
Custom tactical backpacks provide several significant advantages: precisely tailored ergonomics matching your specific body measurements and carrying preferences, optimized organizational layouts designed around your exact equipment inventory, integration of features impossible to find combined in any single commercial product, complete control over material quality and construction methods, and the ability to modify or upgrade as your needs evolve. While the initial investment (time and potentially materials) exceeds purchasing a commercial product, the long-term value proposition becomes compelling for users with specific requirements or those who use their equipment intensively. The personalized fit and function typically result in reduced fatigue, improved operational efficiency, and extended service life compared to compromise-laden commercial alternatives.